
Set up Google Tag Manager now and be prepared for GA4
⚠️This article will only be helpful if you are a Shopify Plus user. For non-plus users, we recommend going to Shopify support for further instructions.
The days of Google Universal Analytics are ending, and with this comes the opportunity to take full advantage of your data as you have never experienced.
After July 1st universal analytics will be gone, and you should be processing your data with google analytics four properties.
This article will guide you in preparing your Shopify store for the switch.
What is going to happen after July 1st, 2023?
Until July 1, 2023, you can continue to use and collect new data in your Universal Analytics properties.
On July 1, 2023, standard Universal Analytics properties will stop processing data.
After July 1, 2023, you'll be able to access your previously processed data in your Universal Analytics property for at least six months. We strongly encourage you to export your historical reports during this time, as there is no official date for when this data will no longer be available.
What you could do and what you should do
Your first instinct might be to install Google Analytics 4 property; even though we encourage you could just do the switch, there is a better way to do it.
Google Analytics 4 has a few problems for e-commerce sites:
- Event tracking is limited. There are many events to track, so it becomes insufficient for most stores.
- Site speed it’s greatly affected if you have a lot of pixels and different tracking codes for each platform you use.
The answer to this problem is Google Tag Manager.
Benefits of using Google Tag Manager with GA4
Google Tag Manager (GTM). As a Shopify store owner, this powerful tool will allow you to easily manage and deploy various tracking tags and codes on your websites without needing manual coding. It acts as a central hub where you can add, edit, and organize tags from different analytics and marketing platforms, such as Google Analytics, Facebook Pixel, and more.
Using Google Tag Manager (GTM) with Google Analytics 4 (GA4) offers several benefits for Shopify store owners. Firstly, GTM allows for easy implementation and management of the GA4 tracking code on your website. Instead of manually editing your website's code, GTM provides a user-friendly interface where you can add the GA4 tag and control its configuration. This streamlines the setup process and eliminates the need for extensive coding knowledge, making it accessible to non-technical users.
Secondly, GTM enables advanced tracking and customization options with GA4. You can utilize GTM's triggers and variables to define specific events and conditions for tracking, such as purchases, form submissions, or user interactions. This granular level of control allows you to gather valuable insights into customer behavior, user journeys, and conversion funnels. With GA4's enhanced analytics capabilities, including machine learning-powered insights and cross-platform tracking, you can comprehensively understand your Shopify store's performance and make data-driven decisions to optimize your marketing strategies and improve overall conversion rates.
In English, what this means is that you can install tracking codes in a centralized way while saving a lot of site speed and having better access to your data.
Where to start
We suggest you install all your tracking pixels via tag manager so that from now on, all your data can be centralized into google analytics to make better business decisions. This includes Tik Tok, Google ads, etc.
This is how you do it.
To use Google Tag Manager with your Shopify Plus online store, you need to do the following:
- Have access to the checkout.liquid file. If you don't have access to this file in your theme code, then contact Shopify Plus Support for help using the Google Tag Manager with checkout extensibility instead.
- Use Shopify's integration for Google Analytics and Facebook Pixel instead of using them with Google Tag Manager.
- Copy the code snippets that are provided by Google Tag Manager into your theme.liquid and checkout.liquid theme files.
Part 1: Installing Google Tag Manager
Add Google Tag Manager code to your theme
1. Install Google Tag Manager to get the code snippets that you will need to copy and paste into your Shopify store.
Because Shopify uses templates, you only need to copy the snippets into the theme.liquid and checkout.liquid files.
If this is your first time installing Google Tag Manager we will help you set it up, pause at the step where you are given two code snippets to add to your web pages, and then follow the instructions below.
- a. In Tag Manager, click the Accounts tab > Create account.
- b. Enter an Account Name and select the country for the account.
- c. Enter a descriptive Container name and select the container type. (you could use your website name or url)
- d. To create your container, click Create and agree to the Terms of Service.

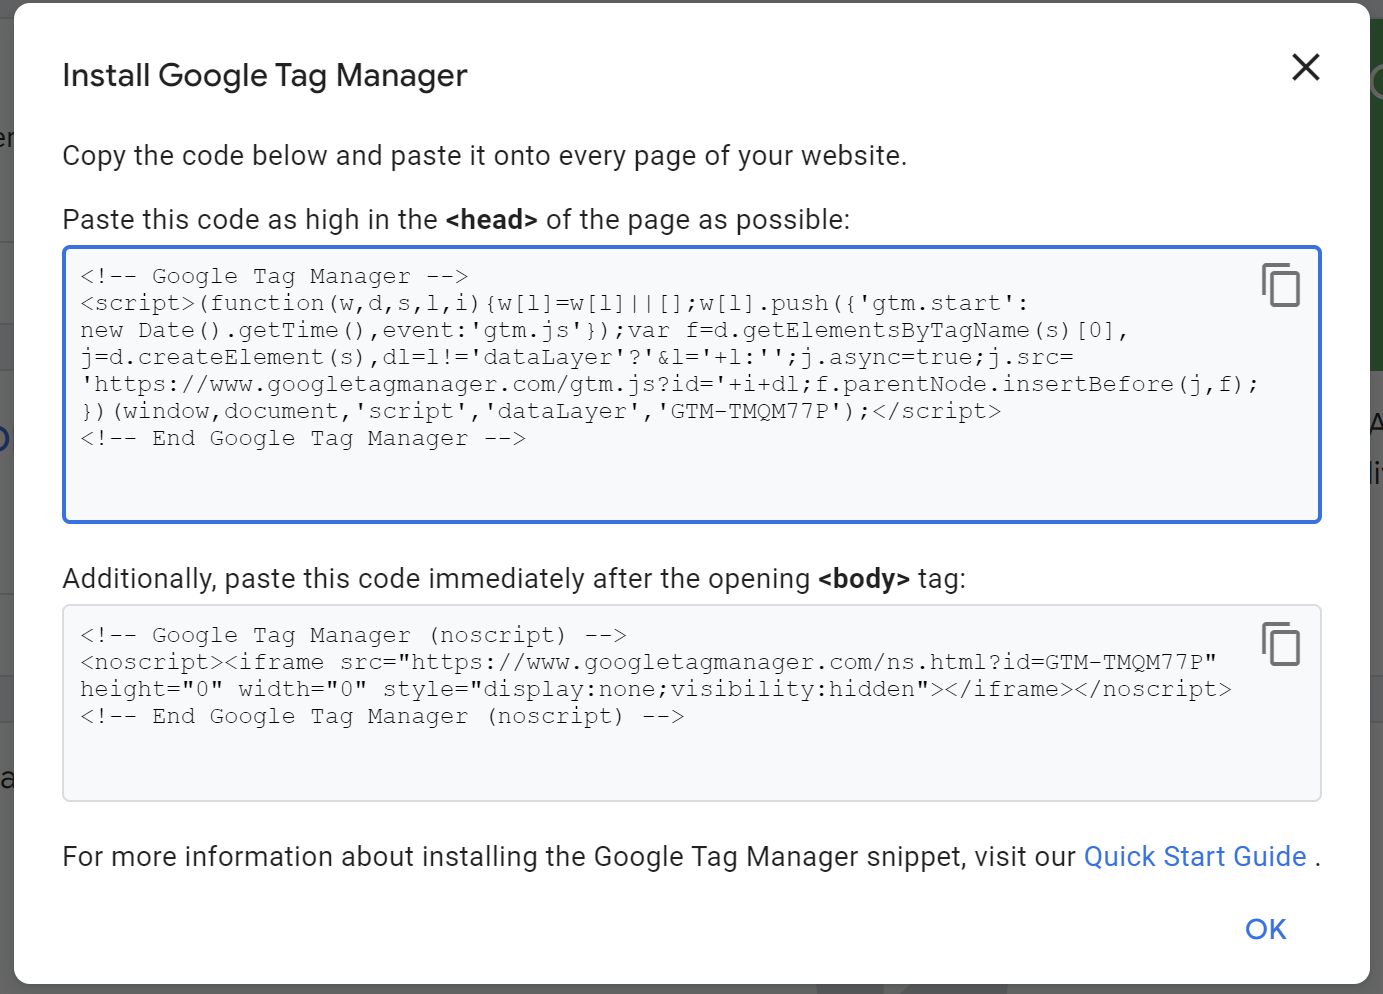
Now you might be redirected to a screen showing the code snippets -see the screenshot below-
If you have already installed Google Tag Manager, then you can find these code snippets in your Google Tag Manager by clicking Admin, and then clicking Install Google Tag Manager.
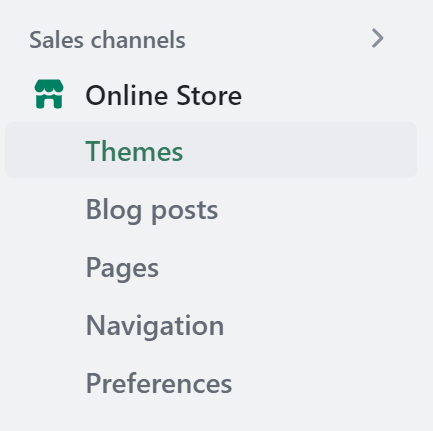
2. In your Shopify admin, click Online store, and then click Themes.
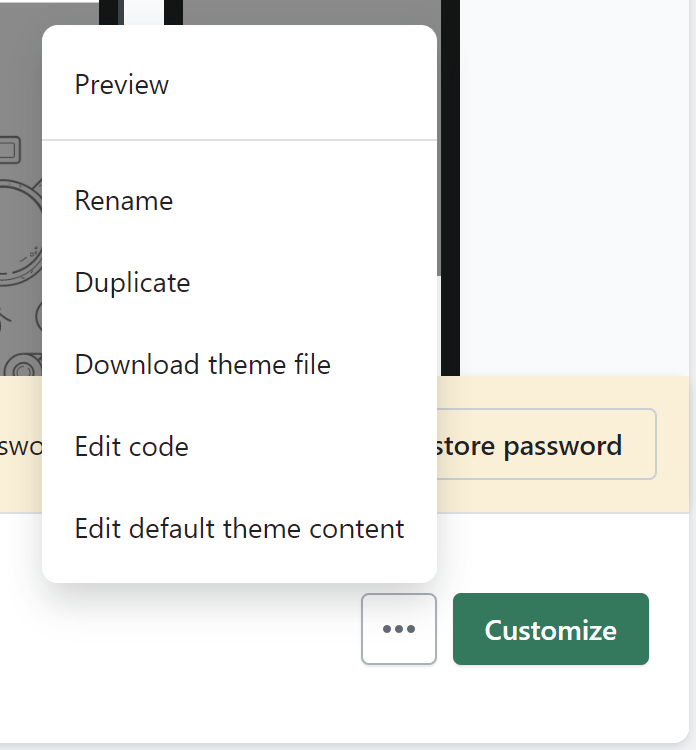
3. In the theme drop-down, click Edit Code.
4. Copy the first code snippet from Google Tag Manager into the <head> tags of your theme.liquid and checkout.liquid code:
- a. Copy the first code snippet from Google Tag Manager
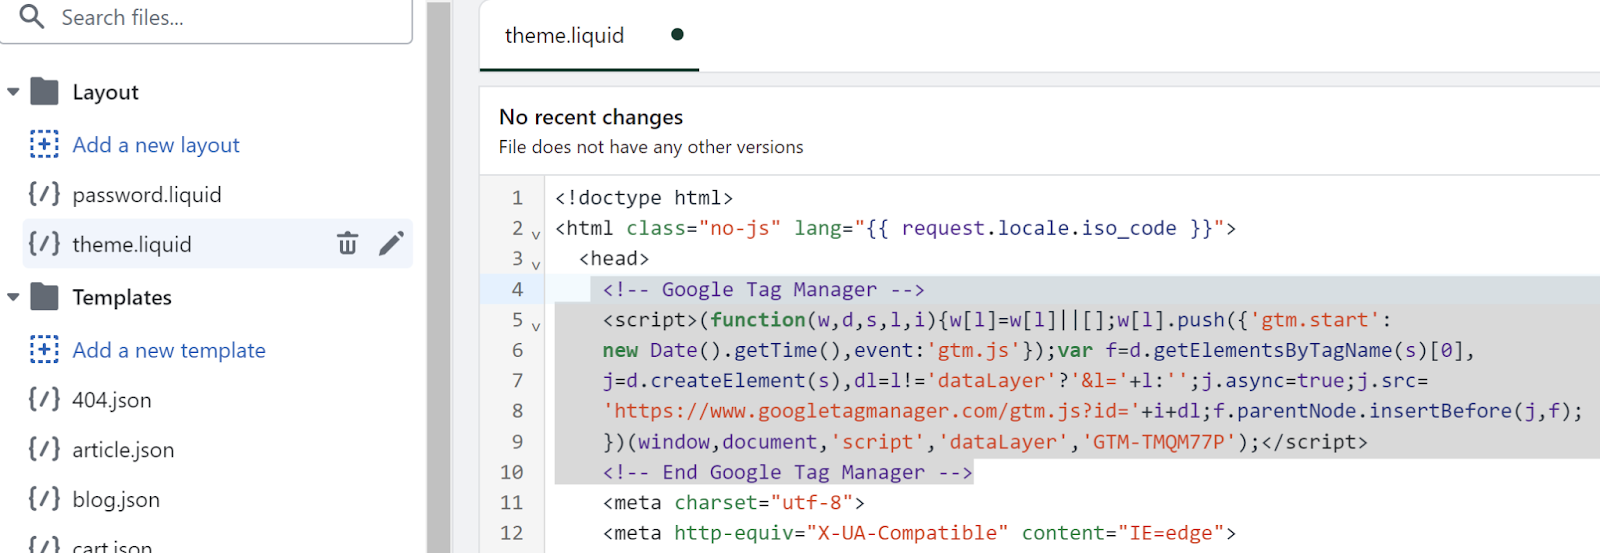
- b. In your Shopify admin, open your theme.liquid file.
- c. Paste the code snippet as high in the <head> of the theme.liquid code as possible.
- d. Open your checkout.liquid file.
- e. Paste the code snippet as high in the <head> of the checkout.liquid code as possible.
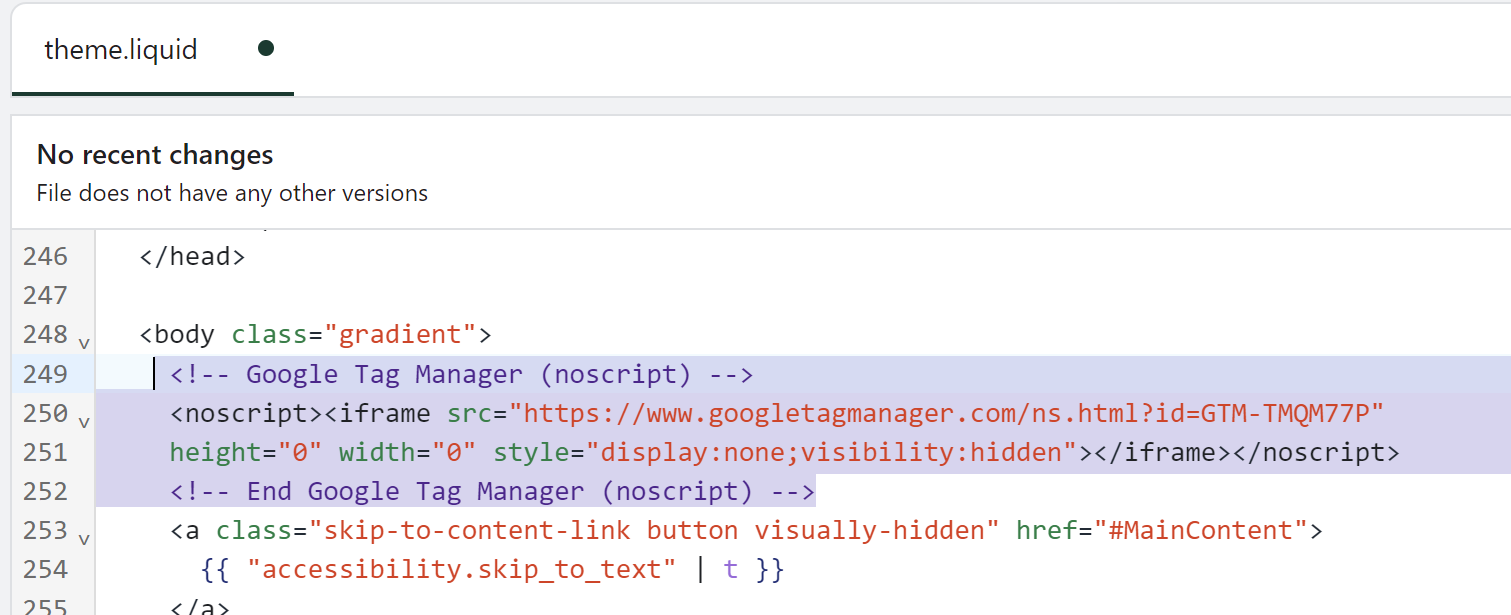
5. Copy the second code snippet from the Google Tag Manager into the <body> tags of your theme.liquid and checkout.liquid code:
- a. In your Shopify admin, open the theme.liquid page.
- b. Paste the code snippet as high in the <body> of the theme.liquid page as possible.
- c. Open the checkout.liquid page.
- d. Paste the code snippet as high in the <body> of the checkout.liquid code as possible.
6. In your Shopify admin, click Save.
7. In Google Tag Manager, continue installing the Google Tag Manager. When prompted to add tags, do not add the following types of tags:
Universal Analytics for Google Analytics
Classic Google Analytics for Google Analytics
Verify that Google Tag Manager is installed.
To verify that you installed Google Tag Manager correctly, you can use:
- the Preview Mode in Google Tag Manager
- the Google Tag Assistant Chrome Extension.
Part 2: Installing Google Analytics 4
Once you have installed Google Tag Manager, you can create a Google Analytics 4 property and install it via GTM; this is how you do it.
Step 1. Getting Started
Set up your Google Analytics 4 property and retrieve your measurement ID
- In your GA account, go to admin and create a property (if you already have a ga4 property go to B)
- You will be redirected to create a data stream (you might already have one for your site)
- Go to tagging instructions and choose google tag manager
- You will be re-directed to GTM; choose account & the container you have created before

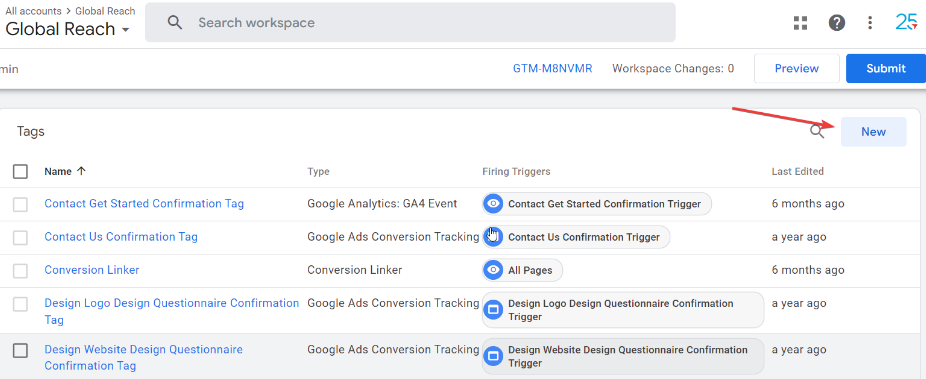
Step 2. Create A New Tag
Head over to your fully set up Google Tag Manager container and select the option to create a new tag.
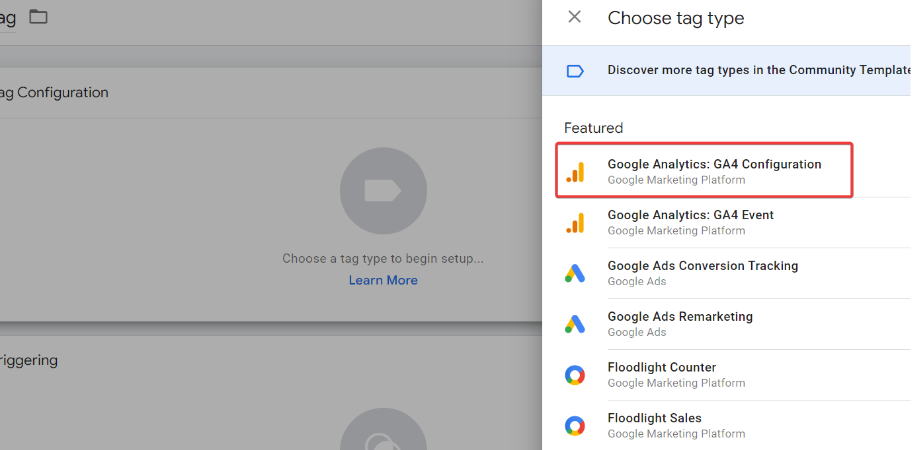
Step 3. Confirm Tag
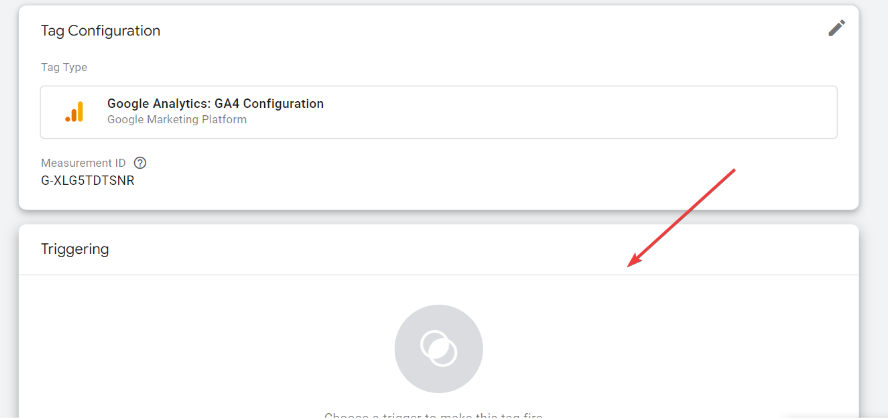
Under Tag Configuration, ensure you select "Google Analytics: GA4 Configuration".
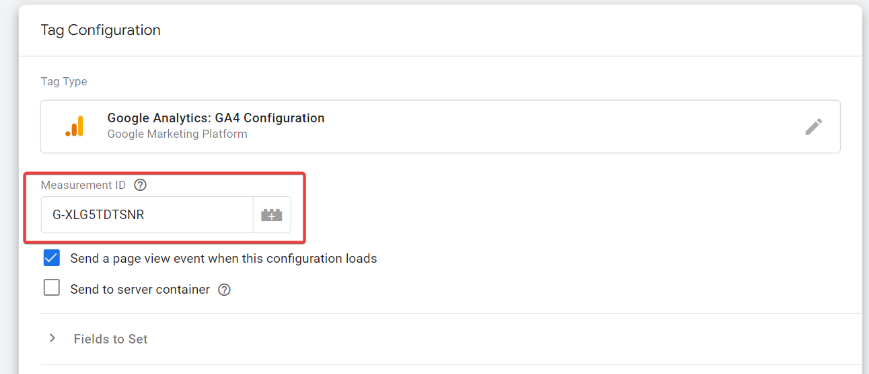
Step 4. Enter Your Measurement ID
Put the Measurement ID into the dedicated Measurement ID box.
(You can find it by going to google analytics > admin > data streams > choose your previously created data stream > copy your measurement id)
Step 5. Add A Trigger
Next, click on the trigger section to add a trigger to complement the tag.
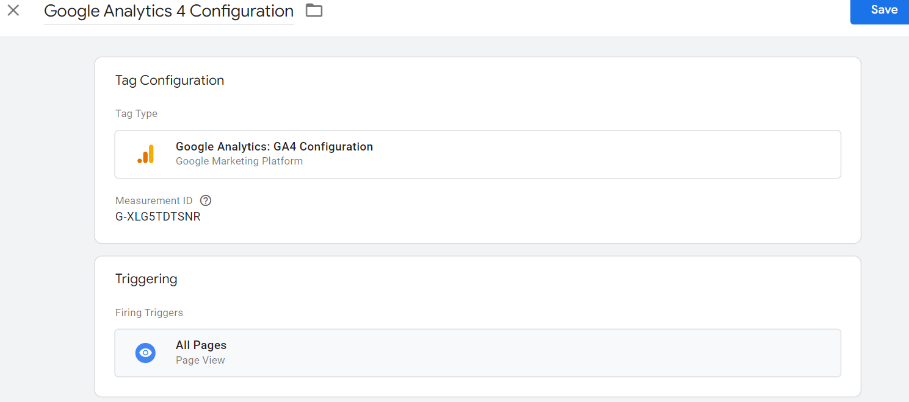
Step 6. Select Your Pages
Select the “All Pages” trigger. This ensures that all pages are encompassed when firing the Google Analytics code.

Step 7. Name Your Tag/Trigger
Go ahead and name your Tag/Trigger. It is recommended that you stick to something relatively simple since it can be tricky to distinguish between your tags if they aren’t named accordingly.
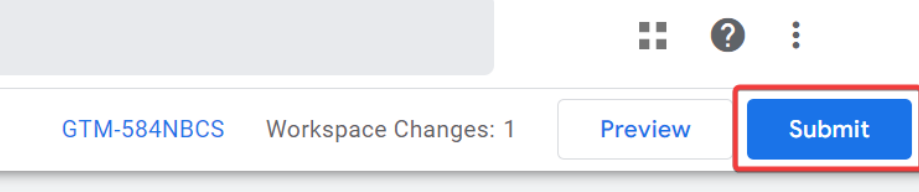
Step 8. Publish.
Click submit, and head over to your Google Analytics property. You should see that data collection is active in a matter of minutes!
These are the events we suggest you track to have a fully comprehensive view of your KPIs:
- Add to cart
- Completed Purchase
- Product viewed
- Cross-domain tracking
- Check out started
- Check out completed
- Refunds
- Form filled
- Video watched
Summary
In conclusion, as the days of Google Universal Analytics come to an end, Shopify store owners must prepare for the switch to Google Analytics 4 (GA4) by setting up Google Tag Manager (GTM). GTM offers a centralized and user-friendly approach to managing tracking tags and codes, eliminating the need for manual coding.
By integrating GTM with GA4, you can streamline the implementation process and gain access to advanced tracking and customization options. This includes improved site speed, centralized data collection, and granular control over events and conditions for tracking. With the transition to GA4 and utilizing GTM, you can make data-driven decisions to optimize marketing strategies and drive better business outcomes.
We hope that this guide was helpful to you; if you have any trouble implementing it, feel free to contact us for help installing it in your Shopify store.
Further reading
Neil Patel guide to Google Analytics 4
Google Analytics official Shopify documentation
Introducing the next generation of Analytics, Google Analytics 4
How to Install Google Analytics 4 (Updated in 2022) with GTAG or GTM
.svg)


